![]()
![]()

Knitting Tips - Corrugated Ribbing: Problems and Solutions
Questions or suggestions?? Contact us
All text and images copyright © 2007 Margaret K.K. Radcliffe
This article is based on information furnished by knitters on the Knitlist, KnitU, and individual friends. I also researched these issues on knitting blogs and archives and through extensive personal experimentation.
What is Corrugated Ribbing?
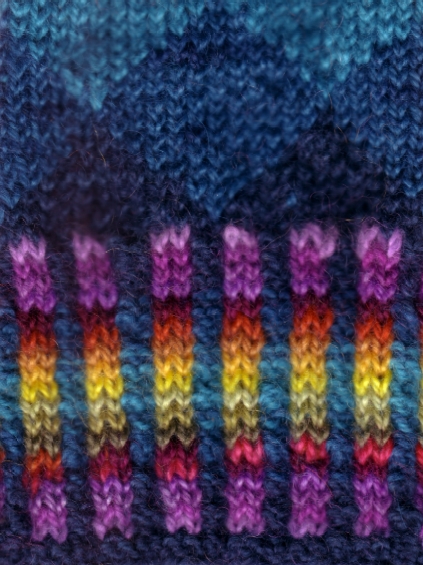
This is ribbing where the knit ribs are in one color and the purl ribs are in a second color. One or both colors may also change on subsequent rows.
Too Tight
Because of the stranding across the back, corrugated ribbing is tighter than and doesnt stretch as much as regular one-color ribbing. Knitters who followed the usual practice of using 90% of the body stitches for
the ribbing and/or working the ribbing on needles two sizes smaller than the body found that the fabric of their corrugated ribbing was too tight and the
ribbing itself was too narrow for the garment. The solution, of course, is to use same number of stitches as for the body and/or to use the same needle size.
Because of individual variations between knitters, test out the needles and percent of stitches you plan to use on your swatch to prevent nasty surprises!
Button Bands
One person mentioned buttonholes and button bands in her response to me, and recommended Ann Feitelsons book, The Art of Fair Isle Knitting (p. 70).
She recommends alternating the two colors (twisting the yarns around each other) in a cabled cast on when casting on to complete each buttonhole.
I sometimes use this technique for the cast on at the beginning of the garment as well. She noted that the knit rib at each end of the button band does have a tendency to curl under, which can be fixed by working the edge stitches in seed stitch (a trick she learned from Dot Ratigan).
Curling
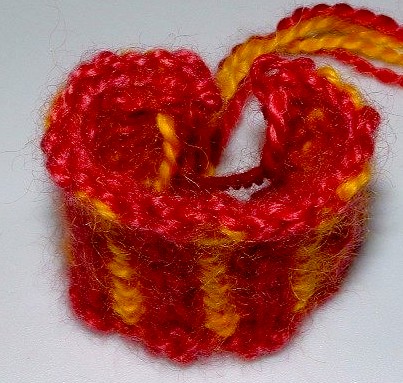
A more prevalent problem is that corrugated ribbing curls up on itself at the bottom edge. For some people, just the cast-on edge curled up.
Many didnt mind the tiny curl so much as the fact that the floats of the contrast color on the back of the fabric peeped out at the bottom.
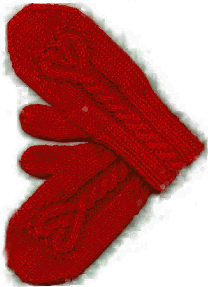
More problems were reported with K1P1 ribbing than with K2P2 ribbing (which explains why Ive never had the problem, since I prefer K2P2 ribbing).
Suggested solutions to the curling problem were to add more purl stitches (such as K1P2, or K2P3 ribbing) or to add the ribbing last and then bind off.
One person had taken a class from Alice Starmore (the queen of corrugated ribbing as far as Im concerned--see her Book of Fair Isle Knitting) who said a firm cast on, such as the cabled
cast on, was required at the beginning of corrugated ribbing. This also explains why I havent had this problem, because I frequently use the cabled cast
on.
Alice Starmores comment also confirmed what I suspected: because corrugated ribbing is firmer (and narrower) than normal ribbing, the loose cast on normally required at the bottom of a sweater is too wide for the ribbing above it.
I spent two mornings casting on in a variety of ways, working the first row in a variety of ways, and evaluating the results. My conclusion is that theres
a whole lot going on at the same time! Luckily, there are only two things you need to worry about:
1) How tight is your cast on. Stockinette has a natural tendency to roll up at the bottom, but a firm cast on wont give in to this tendency. On the other hand, a loose cast on at the bottom of firm corrugated ribbing behaves like a little ruffle and if there is any natural curling it will respond immediately by rolling to the outside.
In my tests, I limited myself to the long-tail and the cabled cast ons. I did the long-tail loosely (assuming that the looser it was, the more of a problem
it would be). The cabled cast on is always firm, and I didnt try to make it any tighter than it naturally is! I also tried ribbed versions of each cast
on (alternately knitting and purling). The ribbed version of the cabled cast on is less firm and more stretchy than the normal knit version.
I always introduced the new color on the first row above the cast on. On that first row, I sometimes knit across, sometimes purled across, and
sometimes worked in ribbing.
2) Working the first row in stockinette (rather than garter or ribbing). Depending on what cast on you use and how you work the first row above it, you may be causing the rolling. For example, if you use the long-tail cast on, youve actually worked one knit row. Like many knitters, I sometimes dislike the way a color change looks on the purled ribs, where the new color interlocks with the old color, so Ill get rid of the problem by working one row in stockinette, then go back to ribbing on the next row. If youre starting your second color immediately after a long-tail cast on and you want to hide the interlock on the purled ribs, then on the first row youd purl across alternating colors. Youve actually worked a second row in stockinette, which always curls. An alternative would be to treat this as the right side of the fabric and to knit across instead. This works to mitigate curling, but the bottom edge has the purled side out (I like the way this looks, but you might not). Another option is to begin the ribbing on the first row at the same time as the new color, and just dont worry about the purled interlocks (this looks just fine in thinner yarns, but the color change is very obvious in bulkier yarns).
For K2P2 ribbing, the following combinations did not curl up:
1) Long-tail CO; started second color on first row in K2P2 ribbing
To summarize, in K2P2 ribbing, with a loose cast on, as long as I worked garter stitch (knitting the first row above the cast on) or began the ribbing immediately, it didnt curl. With a firm cast on, I could do anything (knit, purl or rib) on the first row and it still didnt curl.
2) Long-tail CO; started second color on first row, knitting across (this becomes the right side of the fabric); started K2P2 ribbing on following row.
3) Cabled CO; started second color on first row in K2P2 ribbing
4) Cabled CO; started second color on first row, purling across (this is the wrong side of the fabric; started K2P2 rib on following row.
5) Cabled CO; started second color on first row, knitting across (this is the right side of the fabric); started K2P2 rib on following row.
For K1P1 ribbing, the following combinations did not curl up:
1) Cabled CO; started second color on first row in K1P1 ribbing
In K1P1 ribbing the firm cast on worked as long as I began the ribbing on the first row. It seemed pointless to revert to stockinette or garter stitch,
having already started the ribbing at the cast on, so I didn't even test those options with the ribbed cast ons, which were beautifully flat when followed by the ribbing.
The ribbed versions had an added plus-the color change in the purl rib disappeared into the ribbing. If I wanted a firm edge I would choose the cabled cast on.
If I wanted a stretchy edge, Id use one of the ribbed cast ons.
2) Ribbed cabled CO; started second color on first row in K1P1 ribbing
3) Ribbed long-tail CO; started second color on first row in K1P1 ribbing
More Notes About Curling
Some knitters rely in using a smaller needle to cast on more firmly in their usual way rather than switching to a different cast on.
If youre not used to working with two colors or not used to ribbing with two colors, you can expect your tension to change as you become accustomed to the
technique. From discussions with other knitters, it appears that many start with a very loose cast on, then work the corrugated ribbing loosely immediately
above the cast on. When they begin to get comfortable, their stitches and stranding tighten up. This will cause severe curling to the outside, even more
than if just the cast on is loose. The moral is: its worth working a swatch to get used to the technique. Once the tension is consistent, then start your garment.
All of my ribbed samples did curl to the back lengthwise. This is because the stranding on the back is firm and the front of the knitting stretches around it. Depending on how tight your stranding is, you may have no curling in this direction or it may be severe. For a sweater, hat or mittens, this isnt a problem because it follows the natural curve of the body, but I wouldnt recommend corrugated ribbing for a shawl or scarf if yours curls a lot. To reduce lengthwise curling, try to spread the ribbing out on your needle as you work to avoid too-tight stranding. If youre knitting circularly, especially on small circumferences like a sleeve, turn the knitting inside out. Keep knitting in the same direction, but on the inside of your tube. The stranding will travel around the outside of the tube, and the longer path will help to loosen it. Blocking can cure lengthwise curling if its not too severe.
![]()
![]()
![]()
![]()
![]()
![]()
![]()
![]()
![]()
![]()
![]()
![]()